External GPUs (eGPUs) are only officially supported on Macs equipped with Thunderbolt 3 ports. Currently (as of 01/16/19), all of the MacBooks in the C.R.A.W.LAB only have Thunderbolt 2. However, that interface can be enabled, and its bandwidth is suitable for the type of computation that we use GPUs for. This short tutorial will walk through the steps to set up a Thunderbolt 1/2 equipped MacBook, like those in the lab, to use an eGPU with an AMD card.
Installation
Disable SIP
This link at Apple has the full instructions to disable System Integrity Protection, or SIP. A summary of steps is below:
- Boot the MacBook into recovery mode by holding Command-R at startup.
- Launch a Terminal from the Utilities menu in the menu bar.
-
Enter the following command
csrutil disable -
Restart the MacBook
Once the MacBook restarts, you can then check the status of the change you made by opening a terminal and typing:
csrutil status
purge-wrangler.sh
Users of the egpu.io forums developed a bash script, called purge-wrangler.sh, that will enable eGPU support for Macs with Thunderbolt 1 or 2. The script can be run directly from a terminal by:
curl -s "https://api.github.com/repos/mayankk2308/purge-wrangler/releases/latest" | grep '"browser_download_url":' | sed -E 's/.*"([^"]+)".*/\1/' | xargs curl -L -s -0 > purge-wrangler.sh && chmod +x purge-wrangler.sh && ./purge-wrangler.sh && rm purge-wrangler.sh
You will be prompted to enter your password, then a screen like the one in Figure 1 will appear.
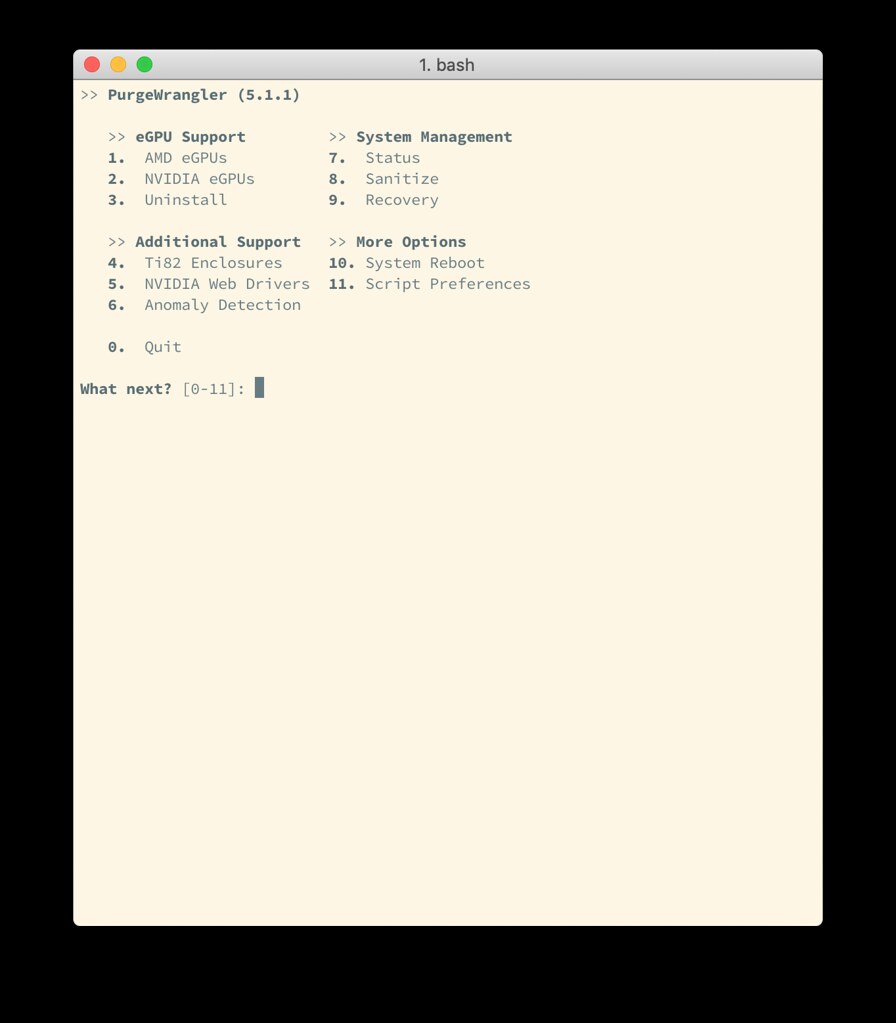
Figure 1: The purge-wrangler Main Menu
For external AMD cards, select option 1 from the menu. You'll then be asked a series of questions to answer yes or no ([Y/N]) to. The answers you should give are listed below:
Enable Legacy AMD eGPUs? [Y/N]: Y

Enable Ti82? [Y/N]: N
After answering those questions you should see a prompt saying Sanitizing system... and be asked if you'd like to return to the main menu. You can then quit the script. For the changes to take effect, you'll need to restart.
eGPU use
After the script is run, the eGPU should work as described in Apple's support article on the subject, including the icon appearing in the menubar when the eGPU is attached. In that article, the method to enable the option for specific app to Prefer External GPU is explained.
In summary, simply right-click on the desired application and select Get Info. Within the information window that opens, you can select the Prefer External GPU option. Be sure to do this for any apps that you definitely want to utilize the eGPU. For example, make sure it is enabled for VirtualBox, as shown in Figure 2.
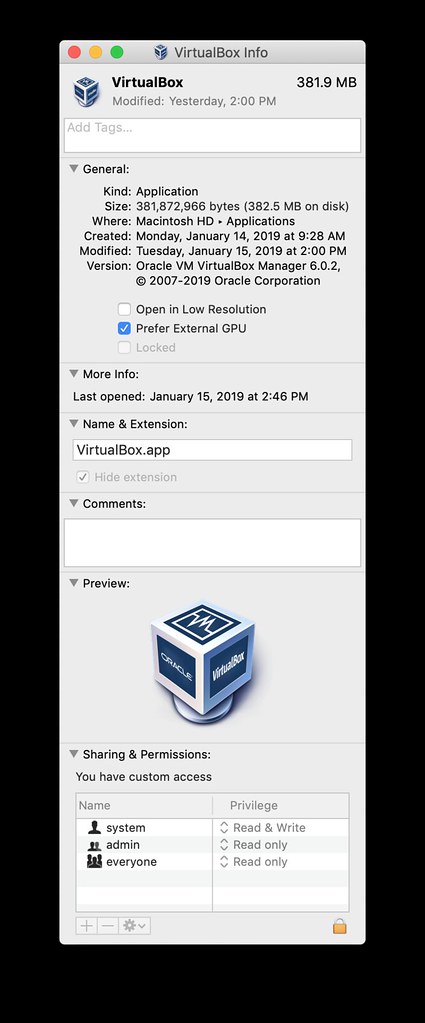
Figure 2: Prefer External GPU Option
VirtualBox Settings
In order to fully utilize the eGPU (or even an internal one) in VirtualBox, you must enable 3D graphics acceleration. Within the settings menu for the virtual machine, select Display, then check the box for Enable 3D Acceleration as shown in Figure 3.
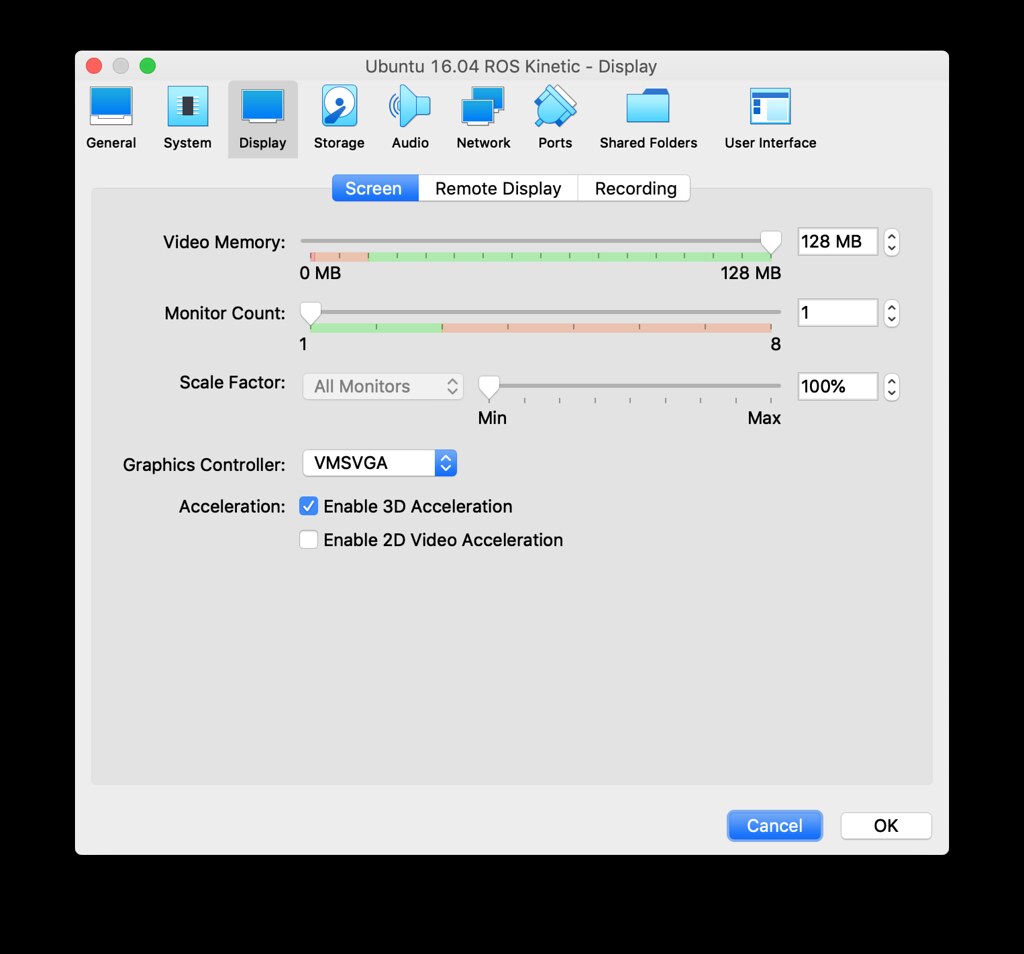
Figure 3: Enable 3D Acceleration in VirtualBox
Monitoring GPU Use
The Activity Monitor application bundled with macOS is now able to monitor and display GPU use. This is one way to ensure that the external GPU is being used when you expect it too. To view GPU use, open the Activity Monitor application, then select Window... GPU History (You can also use the shortcut Command-4 to do so.). A window like the one in Figure 4 should appear, showing the time history of GPU use.
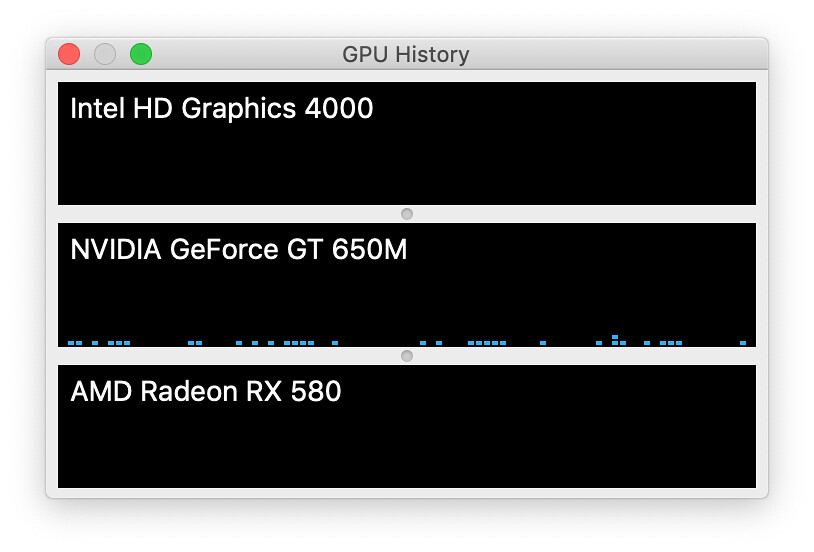
Figure 4: Activity Monitor GPU History
Disconnecting
When you are finished with the eGPU, you need to eject it, similar to how you would eject an external hard drive. To do so, click on the eGPU icon in the menu bar and select the disconnect option.